Fruit Pop Tarts

Macros (Per serving)

Servings: 9
Calories: 290 kcal
Protein: 2.8g
Carbs: 39.5g
Fiber: 2.3g
Fat: 15g

Prep Time: 50 minutes
Cook Time: 22-25 minutes
Total Time: 75 minutes

Pop-Tarts have been a favorite among kids since 1964. And from the look at the supermarket shelves, they still are – except for those of us with Celiac or gluten intolerance. We don’t dare touch them. But what if they could be made gluten free? Our kids, and the kid in us, wouldn’t have to be denied and could enjoy the popular treat too. :)

So that’s what I set out to do.

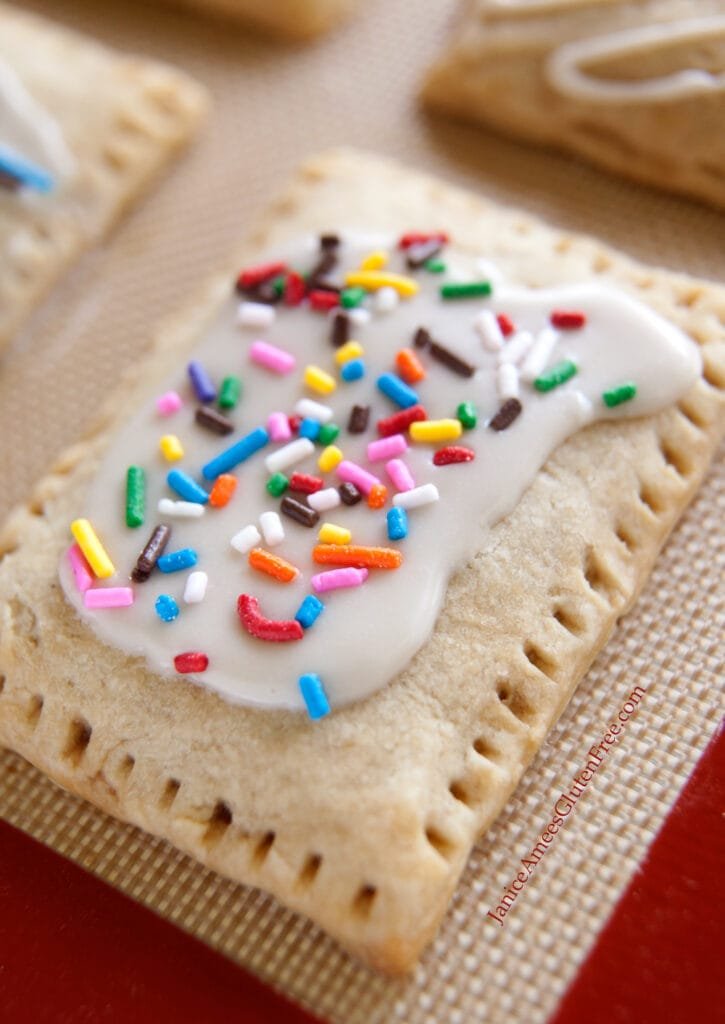
I actually hadn’t eaten a Pop-Tart since I was a kid, but I seemed to remember them as being a bit on the dry side. So I would nibble off all of the corners, then the sides, saving the best part (that fruity center) for last. I don’t know if they’re still like that, but I can assure you, you won’t need to do that with these gluten free pop tarts – because these aren’t dry. They’re flaky and light, with just the right amount of “chewy”. Filled with whatever fruit jam, jelly or preserves you like. Strawberry, raspberry, blueberry, boysenberry, blackberry, apricot…any and all of these are delicious. I prefer to use ones that are organic and 100% fruit. If you like, you an also add a small dab of peanut butter or almond butter to the inside of the pop tart. (My son likes them that way.)

After they’ve baked you might want to drizzle a bit of icing on them, or slather them in icing, if that’s your preference, though I promise you these don’t really need it. They’re good enough to eat plain. Personally, I prefer them that way.

Oh, and these aren’t full of a bunch of things you can’t pronounce, nor do they contain any preservatives. But if you keep them well covered, they’re good for up to 4 days! Ours disappear by then anyway. When you’re ready to eat one, just pop it in the microwave for about 10 seconds to warm it up. YUM!

They can also be frozen. Which means you can make a bunch of them up and pull them out whenever you want. I’ve given instructions for that too.

Ingredients:

  • GF flour mix – 2 cups
    coconut oil, butter or non-dairy butter – 1 cup
  • coconut sugar (Sucanat or organic cane sugar) – 3 Tablespoons or 1 1/2 Tablespoons
  • agave
    xanthan gum or guar gum – 1 teaspoon
  • sea salt – 1/4 teaspoon
    egg or egg replacement – 1 or *1/4 cup
  • apple cider vinegar or lemon juice – 1 Tablespoon
  • cold water – 3 Tablespoons (more, if necessary)
  • fruit jam or jelly – 9 – 12 Tablespoons

ICING – (Optional)

  • powdered sugar/confectioner’s
  • sugar – 1 cup (I use organic)
    water – 1 Tablespoon (more if necessary)
  • vanilla extract – 1/4 teaspoon


Directions:

Measure 1 cup coconut oil, butter or non-dairy butter and pop into the freezer for 15 minutes.

Preheat oven to 350 degrees Fahrenheit.

Lightly spray or grease a cookie sheet.

In a bowl or food processor measure gluten free flour mix, sea salt and xanthan gum and whisk or pulse together.

In a separate bowl whisk together the egg (or egg alternative – see directions below) and 1 Tablespoon vinegar or lemon juice and set aside.

Add the chilled coconut oil or butter to the flour mix.

Cut it with a fork or pulse in the processor until the clumps are gone. If cutting it by hand you will want to add small amounts of the oil/butter at a time so it’s easier to work through.

Now add the egg/vinegar mixture and 3 Tablespoons ice cold water and pulse. (The quickest way to chill the water is to add a few ice cubes to it.) If using a food processor, the dough will ball up on one side – like this:

If, for some reason, it doesn’t do this and is still too crumbly, add a teaspoon (not another Tablespoon) of water. Usually a couple of teaspoons will be enough. Pulse or mix through and check the consistency of the dough again. You don’t want soggy dough, but you also don’t want it falling apart either.

Sprinkle your counter top with a little GF flour mix, and dust your hands and the rolling pin with some as well.

Cut the dough into two equal halves and wrap one of them in plastic – to keep it from drying out – until you’re ready to use it.

Begin gently rolling the first section from the center out – into a rectangular shape approximately 9″ x 12″ – to make 9 (3″ x 4″) pop tarts. Ideally, the dough should be 1/8″ – 1/4″ thick. You may need to sprinkle a bit more flour mix on your rolling pin if the dough sticks to it. To cut them into pop tarts, score the dough both vertically and horizontally. You may do this by using a clean ruler and laying it across the dough and gently marking it into thirds. That will give you 9 (3″ x 4″) rectangles. Or you can always eyeball it, if you’re good at that sort of thing. 

Gently slide a spatula or pancake flipper beneath the dough and lay it on the prepared cookie sheet. Scoop 1 heaping to 1 1/2 Tablespoons of your favorite jam or jelly onto the center of each pop tart and spread it, stopping about 1/2″ from the edges. Do that for each pop tart. Be sure not to overfill your pop tart, or go too close to the edge or it will come bubbling out the side of your pop tart. Not that it wouldn’t still be delicious.

Then repeat the rolling out process for the top half of your pop tart and cut as you did the bottom half.

Brush a little egg white around the inside edges of each piece before you join the two halves. This will help to seal the top and bottom together and prevent the jam from spilling out the sides as it bakes. I haven’t tried doing that with a chia/flax gel, so I’m not sure if it will work the same way, but I can’t see why it wouldn’t.

Lay the dough on top of each of the jelly filled halves and press the edges together. This dough is very forgiving, so you may play with it as needed. For straighter sides, use the flat side of the knife and press against the edge of the sealed pop tart. You may leave them this way or gently press the tines of a fork along the edges.

Prick the top of the dough so steam will have a place to escape. I used a toothpick.

Bake for 22 – 25 minutes – or until edges are slightly golden. Mine take exactly 22 minutes, but oven temperatures may vary, so be sure to keep an eye on them! If you bake them too long it will dry them out. 😛

Finally, decorate them as you like, or leave them plain.

To make the icing: Measure the confectioner’s sugar, water, and vanilla together and mix well. If it’s too thick to work with, add a few additional drops of water and stir.

Freezing your pop tarts: You may freeze the pop tarts AFTER you’ve readied them for the oven, but BEFORE they’ve been baked. A piece of parchment paper beneath them will prevent them from sticking. Lay them on a cookie sheet, side-by-side. Once they’ve frozen (after about 2 hours), you may stack them, with a sheet of parchment between them, if you like. Wrap them well in freezer paper, foil or plastic – to prevent frost or air from getting inside.

To bake your frozen pop tarts: You may remove the prepared pop tarts from the freezer and stick them directly into a preheated oven (350 degrees Fahrenheit) to bake. Add a couple of extra minutes baking time to the original 22 – 25 minutes. If you’d like to add icing, do so after they’ve baked.

No time to finish preparing your pop tarts? You may refrigerate the dough for 3 days (just keep it well covered) or place it in a freezer bag and freeze it. When you’re ready to use it,  defrost it and let it warm/soften before rolling out so it doesn’t crumble and crack.

What can I do with the leftover pieces? The scraps can be shaped into cookies and sprinkled with a little cinnamon and sugar OR shaped into a ball and made into thumbprint cookies by pressing your finger into the center and adding a small dollop of jam before baking for 12 – 14 minutes (depending on how thick you make them). You should be able to get at least a dozen cookies.

 *To make an egg alternative: Measure 1 Tablespoon white chia seeds or ground flax seeds and 3 Tablespoons warm water. Stir together and allow to form a gel before adding as you would an egg. I like to use white chia seeds purely for aesthetics – so I don’t wind up with black speckles in my dough. 🙂